Giving Back

Quilt

Stashpoppa and I are getting ready for an adventure in Brazil so there is a long list of to-do items before the adventure can begin.  One of those items was to attend a wedding shower for a friend’s daughter.  During our conversation my friend mentioned that she still had her daughter’s wedding quilt to quilt and with the wedding  just one week away, she knew she was running out of time.  I weighed in my head all the things this dear friend still needed to do, in addition to her daily employment, and all the things I still needed to do and I decided that helping my friend was the most important thing I should do.  So I offered to quilt the wedding quilt for her.  Knowing that this friend also quilts I wasn’t too sure that my offer would be accepted.  But I had offered!

Three days later there was a knock on my front door.  The bride stood there with her quilt and asked if my offer still stood.  Of course I said yes.  She thanked me profusely and said that her mother would be so relieved if I would do this for them.  That evening was spent putting the quilt on my rails and the next day was dedicated to quilting the wedding quilt.  I had my fingers crossed all day that my machine would cooperate fully, especially that the thread and tension would get along nicely so that the stitching would be perfect.

Corner  Border

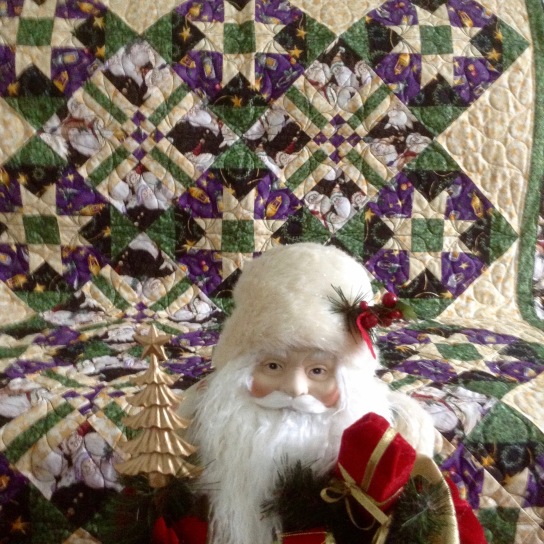
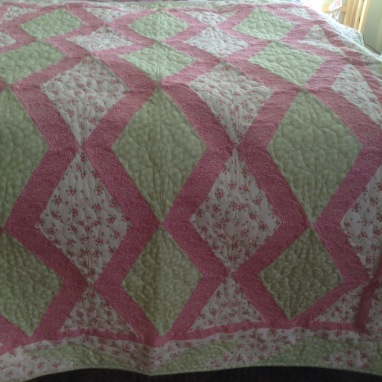
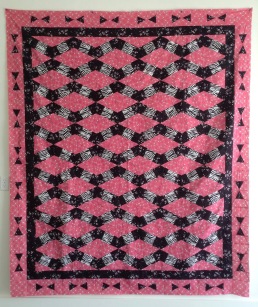
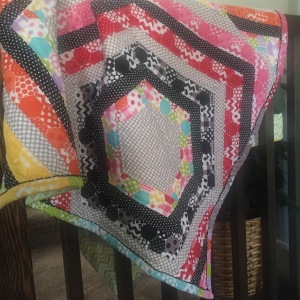
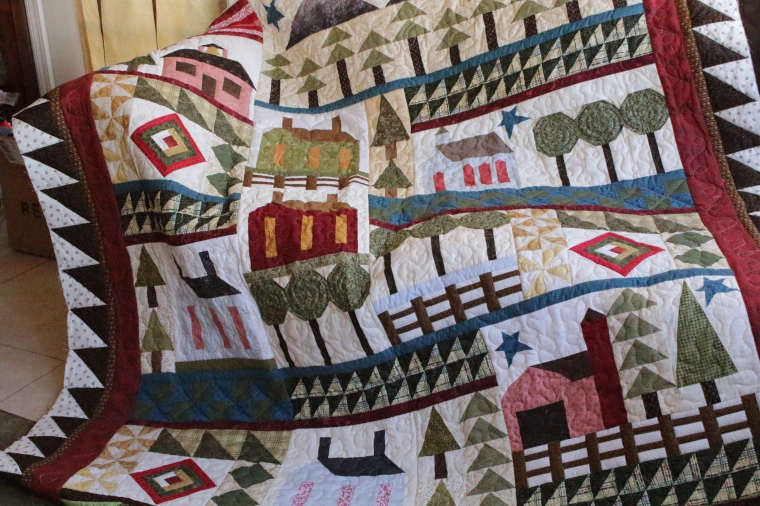
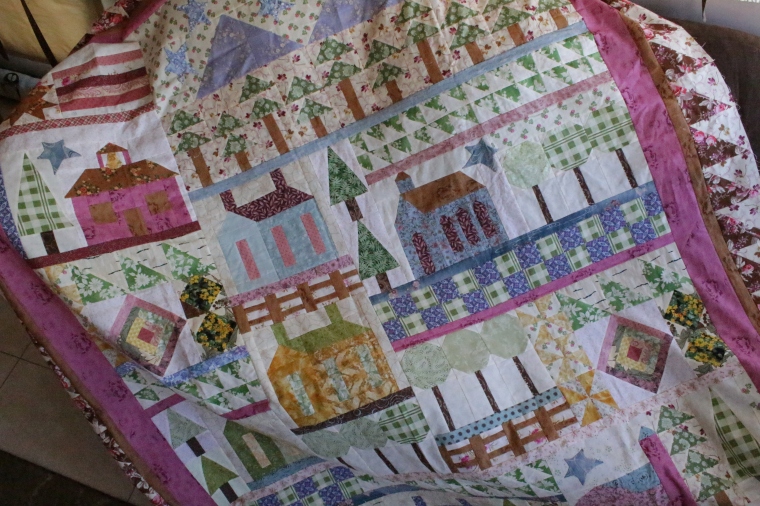
After a long day at the rails, having had to unpick only one small section, the quilt was finished.  As I removed it from the rails I marveled that the stitching was almost perfect.  Almost always when I quilt I have to unpick at least one or two rows because of tension issues.  For whatever reason, this day my machine, the threads, and tension, were all in agreement and the finished product was indeed a beauty.

Back

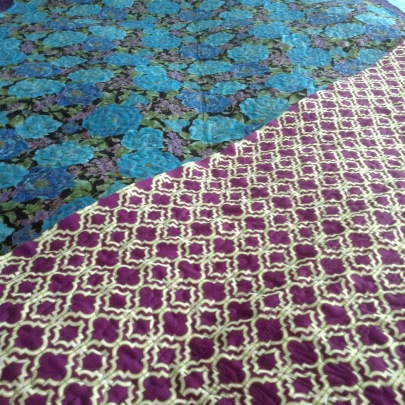
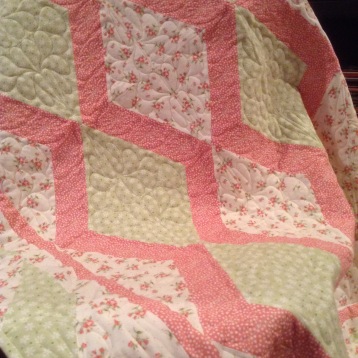
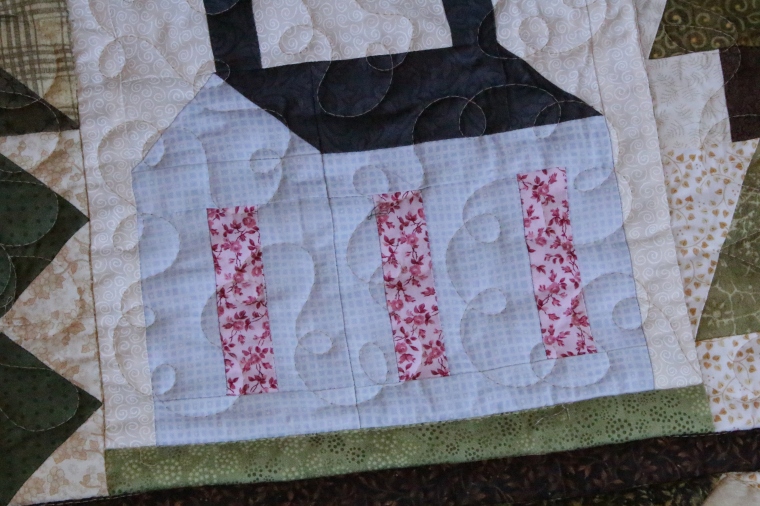
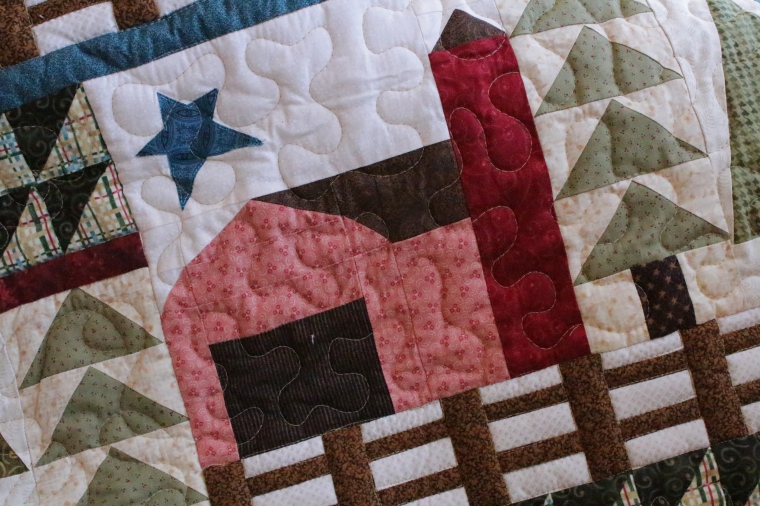
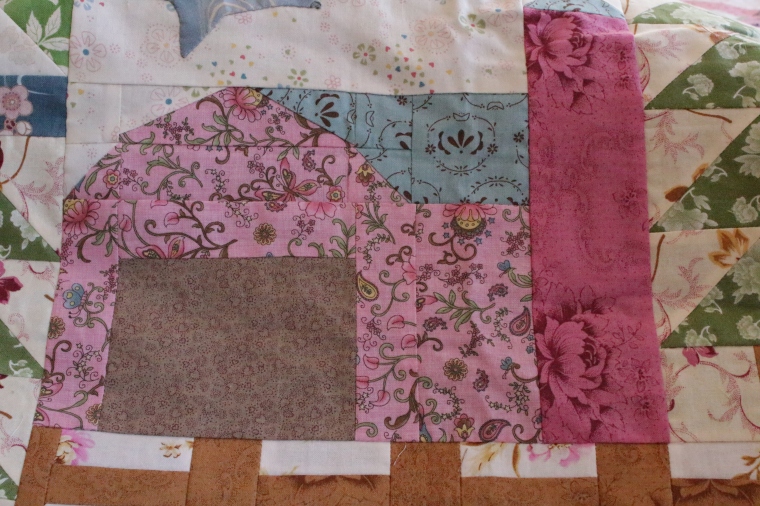
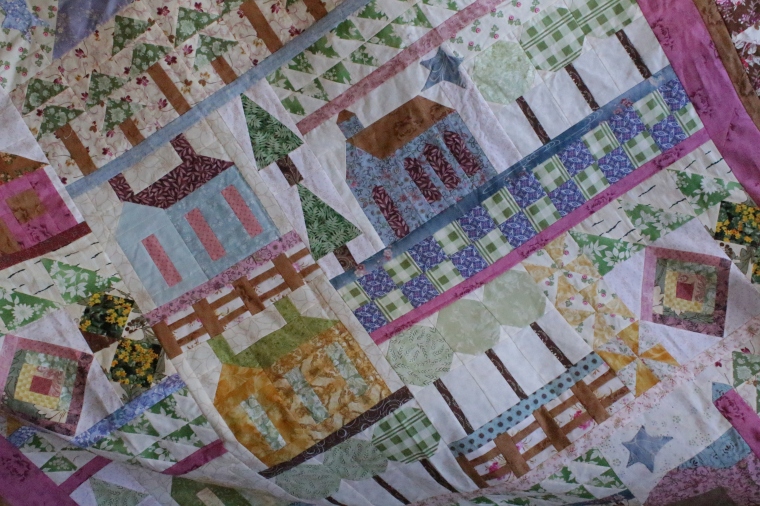
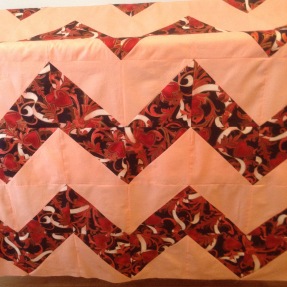
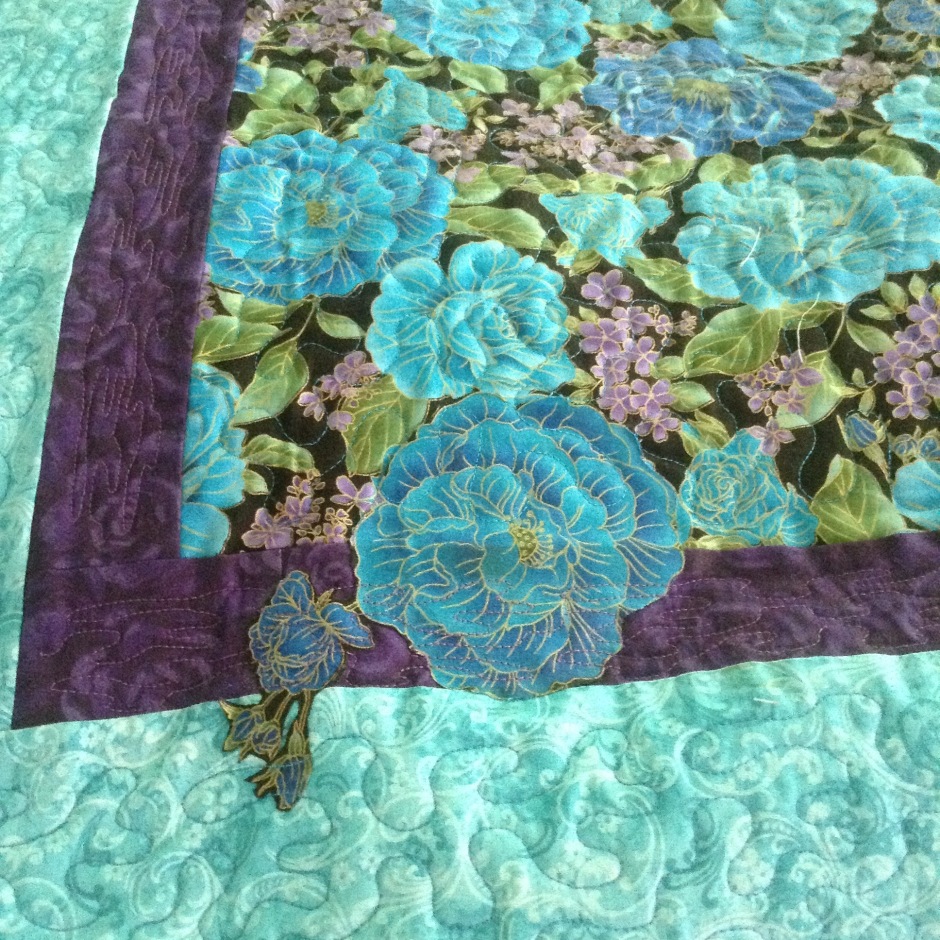
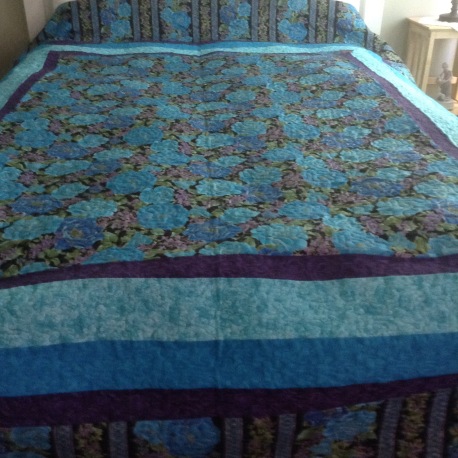
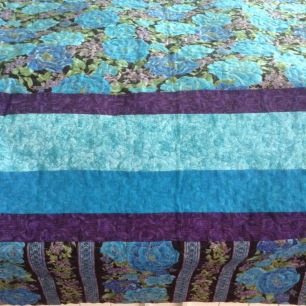
The colors of the quilt are so vibrant and fresh yet timeless that it is one of my favorite quilts.  Also,the bride and both her parents were so pleased with the results that it was very rewarding to know that I had been able to help.  But isn’t that what service to others is all about?

Things I’ve Learned from Carol: 9 Patches

How to Correctly Sew a 9 Patch

Sew together three sets of two squares, right sides together, using a leader piece to sew on and off. (you should end up with three sewn pieces)

Important tip:  Don’t clip the threads between patches, and don’t press them yet.

IMG_7209

Sew on the last block for each row.  Again, don’t clip threads, and don’t press.

IMG_7210
match edges
IMG_7211
sew on third square of each row

IMG_7212

Match the first two rows, right sides together.  Adjust the fabric pieces so that they match on the first seam line in the middle. They should “kiss” each other.  As you sew the rows together, flip the seam allowance up away from you for the first square. This allows the corners to “snuggle” in together nicely.  Use your stiletto and hold the fabric on that middle seam allowance. Gently pull the fabric so that the two pieces “settle” into their proper, matching spots.

IMG_7213
Notice how the seams “kiss” each other.
IMG_7214
Top seam allowance is flipped up, away from you, and bottom seam allowance is flipped down, towards you.

Once you’ve sewn to the middle seam allowance, stop and adjust your fabric again.  The second square of the row is opposite:  Flip the top seam allowance down and towards you, the bottom up and away from you.  Because this “feels” funny for the fabric pieces, they will likely slip a little.  Hold the seams firmly, or better yet, put a pin ahead of the matched seams.  Once you’ve sewn to the second seam allowance, stop and adjust your fabric again, this time matching and then holding the bottoms of the fabric.

IMG_7215
Top seam allowance is flipped down and towards you, bottom seam allowance is flipped up and away from you.
IMG_7216
Placing a pin in front of, or ahead of, the seam allows the fabric to remain in place better.

Repeat this process with the third row of the block.

IMG_7217
You can see by this picture that I still need to work on getting those second seam allowances to snuggle better.   You don’t need to unpick the entire row, however!  Just a few stitches ahead of and behind those mis-matched seam allowances.  Re-position them, remembering to let them “kiss and snuggle.” Re-pin, and re-sew.  If at first you don’t succeed, try, try again!

Pressing a 9-Patch

Similar to pressing a 4-patch, shown here, correctly pressing a 9-patch will give you flatter results.

IMG_7218
Start by clipping a thread from the seam allowance on the raw edge side.  Then, carefully open the center seam allowance so that it lays flat, and mimics a 4-patch.
IMG_7220
Press the seams one at a time, going around as if a clock.  The seams should lay down based on how you’ve opened up the center little 4-patches.

I finished my 9-patch off by adding a cute Around the World sort of border.  I love how it looks!

IMG_3930

Let’s Bee Social!

Christmas in April?

It is when I get a Santa quilt finished in plenty of time to display it this coming Christmas which is still 8 months away! Yahoo!!

XmasScraps

This is actually the second quilt I have made from this fabric.  A few years back when hubby and I were living in England, I made it a point to visit every quilt/fabric shop I could find especially when we were vacationing around the UK.  This beautiful Christmas fabric collection was found in a shop in Cornwall.  I had fallen in love with it before I realized that it was manufactured by a US based company and imported to England.  Translation = double the cost per yard!!

But what is a girl to do when she has fallen in love and really, really wants the fabric? We all know that she buys it!!  And since I did NOT have a pattern in mind, I did not know how much yardage I needed. When estimating I gave myself plenty of wiggle room because I did NOT want to run out of fabric as I would probably never return to this particular shop (and to this date-2016- I have not been back) and chances of finding this line of fabric still being sold when I FINALLY got around to choosing a pattern and then sewing it were pretty nil!!  That being said, I justified the purchase of many yards of each fabric.  Little did I know that I had enough fabric to make not ONE twin-sized quilt but TWO twin-sized quilts plus a pieced backing!!!

 First quilt finished about 2013

XmasOriginal

With fabric still left over from the second quilt, I put on my designing cap and came up with the back.

XmasPileofScraps

From this pile to this back:

XmasScrapBack

So was my initial investment in all this fabric worth it?  Absolutely!!  When I gaze upon my finished quilts, I fall in love all over again with the fabric and remember the lovely time we spent in Cornwall and know that I made the right choice:)

Another unfinished project becomes a finished project!!  How are you doing in finishing those UFO”s?

Let’s Bee Social!

Amateur Photo Shoot with FFO’s (FINALLY Finished Object)

Huzzah!  They’re finally done!

In a previous post, I showed off my piecing for my Patriotically Pink America the Beautiful quilt… I sent it off to my quilter, and she did a marvelous job quilting it with a very subtle stars and stripes.  I love it!

My teenager and I practiced styling it in a photo shoot…very amateur, but you have to start somewhere, right? At the beginning, I was the one suggesting how to set everything.  By the end, she was suggesting her own ideas.

Which America the Beautiful pic is your favorite?


The other UFO that is now an FFO is my coral and teal version of our Jamie Quilt pattern.  (See this post, here)  My quilter, Carla, suggested using a quilting pattern that was sort of Art Deco-ish, which worked beautifully.  I love how sophisticated this quilt looks!

As for the photos, I wish I had been taking pictures of the photographer, because it was fun to watch her lying on her back and aiming the camera upside down to get the photo taken in the orange tree.


(By the way, the featured image at the top of this post is one of the “practice” shots my budding photographer took)

Let’s Bee Social!

Things I’ve Learned from Carol: Four Patches

So… (pun intended)… I have pieced many a quilt.  I’ve been quilting for at least 20 years (yes, I started quilting while still in my mother’s womb!) and until last month, I didn’t realize how many bad habits I had, or even that although I had taught myself adequately, my techniques needed work.  And some things I have been doing for all these years were just plain wrong.  I could never figure out why my blocks would never come out square and the size the pattern would tell me it should be.  Instead of investigating, (remember I am the LAZY quilter of this bunch!) I just chalked it up to the weight of the thread, or the weave of the fabric, or rulers that scooted, or whatever other excuse we have all made for getting wonky squares.

And then I sewed with Carol.  And she taught me how to finally get a block to come out square and flat, and even have matching seams.

I pass along this information for two reasons.  The first is selfish:  I learn best when I have to regurgitate information and teach it to others.  The second is more altruistic:  I  simply hope that it will help someone out there in cyberspace take one more baby step on their journey to being a better quilter.

How to Correctly Sew a Four Patch

Sew together two sets of two squares, right sides together, using a leader piece to sew on and off. (you should end up with two sewn pieces)

Don’t iron the first two pieces you have sewn together!  (This is probably THE MOST IMPORTANT step I never knew!)

stashladiespic1

Sew them first to the other two patches, matching the top of your two pieces.

stashladiespic2

Use a leader, sew onto the fabric and stop.

stashladiespic3

Adjust the fabric pieces so that they match on the seam line in the middle. They should “kiss” each other.

stashladiespic4

The seam allowance of the top piece should always face away from you and the bottom towards you. This will allow the fabric to “fall” or “snuggle” into it’s correct position.

stashladiespic5

stashladiespic6

Use your stiletto and hold the fabric on that middle seam allowance. Gently pull the fabric so that the two pieces “settle” into their proper, matching spots.

stashladiespic7

Once you’ve sewn to the middle seam allowance, stop and adjust your fabric again, this time matching and then holding the bottoms of the fabric.

stashladiespic8

stashladiespic9

Sew off onto your leader.

IMG_5786

To iron your four patch:

Clip one of the seams from the seam allowance of the middle, bulky part of the patch. This will allow the seams to be pressed the correct direction.

IMG_5789IMG_5791

 Looking from the back, seam allowances should go clock wise around the square. So, press one down towards you (just the seam, NOT the whole patch), then move to the next one going clockwise around.

IMG_5795

Because you clipped that seam, the center seam allowances should now open up and lay flat- no more bulk!  It’s like magic! 🙂

IMG_5802

Once the seams are pressed, press again (from the back still), gently pulling the corners into square position.

Flip the four patch over and press again on the seams, going clockwise.


Pull the pieces gently to allow the iron to make sure the seam is nice and flat with no “lips.”

IMG_5809

Voila!  That is one good looking four-patch!

*A huge Shout-Out to my 16 year old photographer!*

Let’s Bee Social!

Spring Is Coming!!

It has been a long, cold winter with more snow on the ground than has been seen for almost a decade.  With the water shortage we have faced for the past few years I am grateful for all the snow we received, but I am so ready for warmer temperatures and no snow adorning the ground!  So to celebrate the coming of Spring, I finished a quilt colored spring green and baby pink!

XBlockQuilt


This color combination is one of my favorite.  It speaks to me of calmness and gentleness.  Years ago when we were just out of college and starting life in the “real world” we bought our first home.  It was an older home that had been remodeled but I wanted to put my touch on it and I had big plans!  The first project was redoing our daughter’s bedroom.  I scraped off wallpaper and Stash Poppa built drawers into the attic eaves.  Guess what color I painted the walls?  Yup, spring green with an accent wall of baby pink!!  I loved it!!

Years later when perusing a quilt catalog I saw this fabric and knew it belonged in my stash- spring green and baby pink flannels.  And then when  I attended a class at one of my favorite Bernina stores introducing X-blocks rulers I knew that fabric needed to be made into an X-block quilt.  So I bought the rulers and the book, Once Upon A Time in X-Blocks Land It’s a Fabric Fairy Tale! by Patricia Pepe.  You can find the book at xblocks.com.

OnceCover_th.jpg

I got home and the rulers, book and fabric got put away for a few years until I hired my daughter to sew for me.  We decided on the quilt pattern, Sleeping Beauty, found in the X-blocks book and she loved sewing with the X-blocks so much that she and her daughter (my granddaughter) designed their own pattern.  We now market her pattern as Hot Lips.

HotLipstop                                    Red:turquoise

You can find the pattern, kits for the quilts we’ve made, and also X-blocks rulers in our shop at stashladies.com

So in the spirit of finishing UFO’s in 2016, this quilt top was high on my list.  I knew I wanted the same simple, yet elegant design we used for the red/turquoise Hot Lips quilt.  One can never go wrong with a feather design as they always looks so lovely.

green:pinkQuilt

Another UFO bites the dust!  My only question now is who should I give it to?

Let’s Bee Social!

The Rippling Hexi Quilt

In the spirit of finishing our Unfinished Projects in 2016. I present to you today:

The Rippling Hexi QuiltRippling Hexi Main

Just a little back story on this project.  I LOVE hexi’s!!  I picked up this darling Jelly Roll of Riley Blake Hexagon fabric at Quilt Market 2014.   Needless to say that for over a year, I thought and thought and picked my brain on how to best use this jelly roll.  I knew I wanted to make something Hexi, but I wanted to go hexi big!  One day I was perusing all the beautiful log cabin blocks out there, and had light bulb moment.  I sat down the next day and started to sew.

My finished quilt measures 38″ x 53″ (But it is easily adaptable to go bigger or smaller)

Supplies for this project:

1 jelly roll-2 1/2in strips

2 yards coordinating fabric (I used 1 yard of a grey & white polka dot and 1 yard of a black and white polka dot)

Batting

Backing Fabric

Binding (I striped my leftover fabric and used that for binding)

Hexagon Template (Marti Michell: My Favorite Hexagon Ruler 6 sizes-2-4/12 Finished Sizes)

Cutting Fabric:

Using Template: Cut your beginning size hexagon out of chosen yardage fabric.  I chose to use the largest size on my template which has 5” sides finishing off to 4 1/2 inch sides and I cut my Hexagon out of the grey & white polka dot fabric. 

Cut the rest of your yardage into 2 1/2 inch strips for easy sewing.

Organizing for Sewing:

I went thru my jelly roll and organized my strips into rainbow order (Red Pink Orange Yellow Green Blue) and then I took the multi colored stripes and “placed” them where I thought they would blend in the best.  It was the same process for the black & grey fabric from the Jelly Roll pack.  It was my plan all along to alternate the black & white polka dot fabric between each of the jelly roll fabric.  Because I started with the grey & white, it was easy to alternate from there.

Sewing:

This is where it gets fun!  Grab your headphones, tablet, a book on tape or episode to binge watch and let’s get going. 

1. Take your hexagon and sew the first jelly roll strip to just one side of the Hexagon! 

2. Stop and press seam open with preferred method.  (I pressed to one side on this project)

3. Trim the excess strip with ruler and rotary cutter, being careful to trim exactly to the next side of the hexagon.   Repeat Steps 1 thru 3 of the sewing directions.  This time trimming the first sewn edge to keep the hexagon angles.Hexi 1

Strip 2:

Hexi 2

Strip 3:

Hexi 3

Strip 4:

Hexi 4

Strip 5: 

Hexi 5

Strip 6:

Hexi 6

And there is the beginning of your adorable Rippling Hexagon quilt.  Now, if you notice on the main picture of my quilt, I decided to off set the main hexagon for a fun variation.  To do this you need to decide how “wide” you want your quilt.  Add several rows of strips just like described above.  After you have made several rows around the main hexagon, you can square up the bottom corner.

Hexi layer

Keep sewing on the remaining three sides until you have achieved the “width” that you would like your quilt to be. When it gets to that point, square the second corner (taking care to make sure your hexi is straight) From that point on… you are only sewing on 2 sides and then on 1 side. 

Once you have reached the height of the quilt are making you can give it one good press, layer it with batting and backing and quilt it as you see fit. 

I find a scrappy binding is an adorable way to finish off a quilt as bright and scrappy as this.  Plus I love the fact that there is no left overs. 

Rippling Hexi 2

If you would like a printable version of this quilt, please visit our free projects page. (And if you aren’t registered, please do so. We pinky promise that we won’t share your information!!)

Let’s Bee Social!

Things I’ve learned from Carol

I belong to a local quilt group- we are loosely organized, and in no way resemble a guild, but we get together once a month and work on quilts.  Sometimes we are all doing the same one, and sometimes we are just working on our own things.  We are lucky enough to have a woman in the group who also teaches classes at the local quilt stores.  She is amazing, and I have learned so much from her.

Recently, we started working on an awesome new pattern put out by Lori Holt of Bee in my Bonnet called Farm Girl Vintage. (I have yards and yards of fabric from Art Gallery that is just dying to be used, and I think this quilt will look awesome in a sort of bohemian look, but I digress…)

Image 1

As we began our first blocks, and Carol showed us how and what to do, I realized that I had taught myself wrong, and that if I followed her instructions, I would be much happier with my final results.  (Now mind you, I JUST learned this, like a week ago, so I’m still in the process of learning.)  It occurred to me that if I didn’t know these things, maybe others didn’t either. I happen to learn best by regurgitating information, so, I am going to write a blog series called “Things I’ve Learned From Carol.”

  • Always start and END seams with the leader fabric. This way you don’t get bird’s nests at the beginning, and the feed dogs don’t try to eat your fabric at the end.

This is leader fabric.  I just grab some smaller, scrap pieces and use that:

IMG_1841

  • Sew onto your fabric, then pause and match up the bottom of the pieces, holding them in your left hand. Gently pull and adjust the two pieces so they lay straight and match up.

Sewing onto the fabric:

IMG_1845

Matching up the pieces.  You don’t need to use pins for small piecework like this:

IMG_1846

  • With your right hand, guide the fabric as you sew using a stiletto as a mobile “pin”. Your left hand is holding the bottom of the fabric that you just matched, making sure it stays matched up.  If you gently “tug” the fabric in this way (with your left hand holding the bottom, and the top being kept still by the needle), the fabric should just fall into alignment.

Keep the stiletto on the fabric, moving it down, until it hits the needle and runs out of room at the bottom:

IMG_1848

Sewing off the fabric:

IMG_1849

  • Ironing: Before you set a seam, make sure the edges of both fabrics lie straight and match each other. Otherwise, the fabric tends to swoop out and make ripples once it’s opened up:

IMG_1854

Setting a seam is an important step of quilting.  When you set a seam (simply pressing the seam after you’ve sewn it, but before you open it up), it allows the thread to sink into the fabric.  This will make your patchwork flat and lovely.  It also will smooth out many tension issues that can cause wrinkles and puckers.

Setting the seam:

IMG_1852

  • After the seam is set and both ends of the pieces match, open the fabric and using the tip of the iron, gently run down the length of the seam opening the fabric as you go.

IMG_1855

  • I like my seams pressed open unless I’m doing a really bulky corner. (I know, I know, this will probably cause a riot in the comments section… have at it!  What are your reasons for pressing closed or open? I’d love to hear!) I have a neat little tailors seam stick that allows me to press the seam open really nicely.

IMG_1856

IMG_1857

  • Finally, turn the fabric right side up, set the iron down across the whole seam and “press.” (Don’t iron- the ironing motion stretches the fabric out)

IMG_1858

I would love to hear if any of this helps anyone but myself out!

(BTW, a big kudos and shout out to my 16 year old who is my photographer… it always amazes me how tech savvy these kids are!  She is taking photography this semester and loves it… she definitely has a knack for it, too!)

Let’s Bee Social Today!

Quilted Harmonies- America the Beautiful UFO

The first UFO I chose to finish for this year’s UFO series was a quilt that I had begun with my VBQF (Very Best Quilt Friend) almost 3 years ago. It was a 6 month Block of the Month she had found in the Jan/Feb 2011 issue of McCall’s Quilting, and had been dying to do.

“6 months!” She said.

“No problem!” She promised.

“We can do it!” We told each other.

Bwahahahahahahahahahahahahahahaha!

We started off strong and met every month- for the first two months. Then, we’d stretch it out to six weeks. Then it was every 3 months. We finally made a push to get it done, and she finished hers and sent it off to the quilter. I had everything done for mine except the borders. For some reason, I always stall on the borders, and this one especially as the final border was pieced. Since I was so close to finishing, this seemed like the ideal candidate to begin this blog series. (Please tell me that I am not the only one who gets back-logged on Block of the Month quilts!!)

My VBQF is very traditional in her color choices. She likes navy and tan and blacks and blues. So, she chose to piece her version of America the Beautiful using those colors.

IMG_0160

IMG_0161

IMG_0162

Way back when I was beginning to think about this pattern, one of my favorite fabric designers, Verna Mosquera from Vintage Spool, had just put out her new fabric collection called October skies. I loved it. Who cared that it was pink and brown? America the Beautiful can be pink, white, and blue, right?

This was the piece that started it all:

125108926_amazoncom-westminster-fibers-verna-mosquera-october-

(I ended up using it as my backing, but all of my borders and sashings come from this line. And I matched my inner fabrics to the outer, collection fabrics.

IMG_0165

IMG_0169IMG_0170IMG_0166

I love how it turned out!

I just sent this baby off to my quilter, so stay tuned for a final showcase!

What color way would you choose for this pattern?

Linking up with Let’s Bee Social!

An Unfinished Project is Finished!!

This is the year of finishing unfinished projects.  So I pulled out a few of those babies and decided to start with a chevron quilt using fabric from my stash that I started a few years ago when chevron anything became so popular.

QuiltFront


I started by cutting squares of two different fabrics, cutting them diagonally and then sewing the two fabrics together to form a square.  Then my thinking cap came on and I realized that this was the perfect project for practicing the “sew and slash of squares” method. (My name for the technique!)  The quilting world calls these the “Half-Square Triangles.”

2 squares 

Cut squares from two different fabrics.  Size doesn’t matter, only that all the squares are the same size.  On one of the squares on the WRONG side, draw a line on the diagonal.  There are rulers out there designed for this purpose but I just use whatever ruler is long enough for the diagonal.  DiagonalLine

Layer a square from each fabric (2 squares) on top of each other RS together.  Using the center line as your guide, sew a ¼” seam line on each side.

DiagonalSeams

Cut on the center line and Voila, you have two half-square triangle blocks.
DiagonalCut

So much easier than cutting squares on the diagonal and THEN sewing another triangle to it to make it square again!!

Don’t forget to press the seams at each step.  I prefer to press my seams open as opposed to one side, as I get a flatter seam and more precise matching of points.  BUT, because you are pressing on the diagonal be very careful to not slide the iron along the seam but lift and press as you go.  Sliding the iron will distort the fabric and then the square will no longer be square!! I often use a small applique iron to press the seams open.
SeamPressedOpen

PerfectPoint


 After pressing the seams and blocks, “square” them up by trimming the blocks to the size required.    This is a step that I am always tempted to  omit because of the time involved but if I really want my quilt to be square and precise and the points to match up THEN this step is necessary.  Take your pick of the rulers available to make this job easier.SquaringUp


Now comes the really fun part!  Lay out your completed half-square triangle (HST) blocks in the design of your choice.  Sew blocks together, then rows together, until you have a quilt top the size you want.

QuiltTop


 I decided to practice on a 9” square which when sewn into a half-square triangle block equals an 8 ½” square.  Using fabric from my stash, I only had enough for a 7 blocks across and 7 blocks down for a throw quilt size of 56” square.  In sewing all the blocks together in a chevron design it was necessary to follow a chart to make sure that the blocks were sewn in the correct direction.  Another example of using my mind:)

 With the top finished, it was time to do something with the pile of left over scraps of fabric.   The miser in me wants to use every bit of fabric that I can so I decided to piece the backing using the scraps.  With no design or plan in mind, I laid out all the left over fabric on my cutting table and mulled over different configurations.  After changing my mind many times I finally settled on the design configuration that used almost every last piece of fabric and with the addition of some other stash fabric the back was finished.

QuiltBack

On to the rails!!  With the back pinned on it was time to add the batting.  I use Quilters Dream Wool Batting and absolutely love it.  It is lightweight with a ¼” loft.  Machine quilting on it is a dream and it washes beautifully.  And the batting comes in a quilt throw size of 60” x 60” which was the perfect size for this quilt.

 After pinning on the top it’s on to the quilting.  My rails are from Bernina and I quilt with a Bernina 820, using Quilt Motion Touch.  I learned a few years back that I am too much an A personality and free motion quilting was NOT a relaxing adventure!   After a learning curve, machine and software issues resolved, I am quite comfortable using the software and am now experimenting more with the many choices of motives available.  I am finding that I enjoy this process almost as much as the actual sewing of the quilt tops.  Another example of keeping my mind active:)

Quilting

Until the next “unfinished” project is finished. . . .