
I belong to a local quilt group- we are loosely organized, and in no way resemble a guild, but we get together once a month and work on quilts. Sometimes we are all doing the same one, and sometimes we are just working on our own things. We are lucky enough to have a woman in the group who also teaches classes at the local quilt stores. She is amazing, and I have learned so much from her.
Recently, we started working on an awesome new pattern put out by Lori Holt of Bee in my Bonnet called Farm Girl Vintage. (I have yards and yards of fabric from Art Gallery that is just dying to be used, and I think this quilt will look awesome in a sort of bohemian look, but I digress…)
As we began our first blocks, and Carol showed us how and what to do, I realized that I had taught myself wrong, and that if I followed her instructions, I would be much happier with my final results. (Now mind you, I JUST learned this, like a week ago, so I’m still in the process of learning.) It occurred to me that if I didn’t know these things, maybe others didn’t either. I happen to learn best by regurgitating information, so, I am going to write a blog series called “Things I’ve Learned From Carol.”
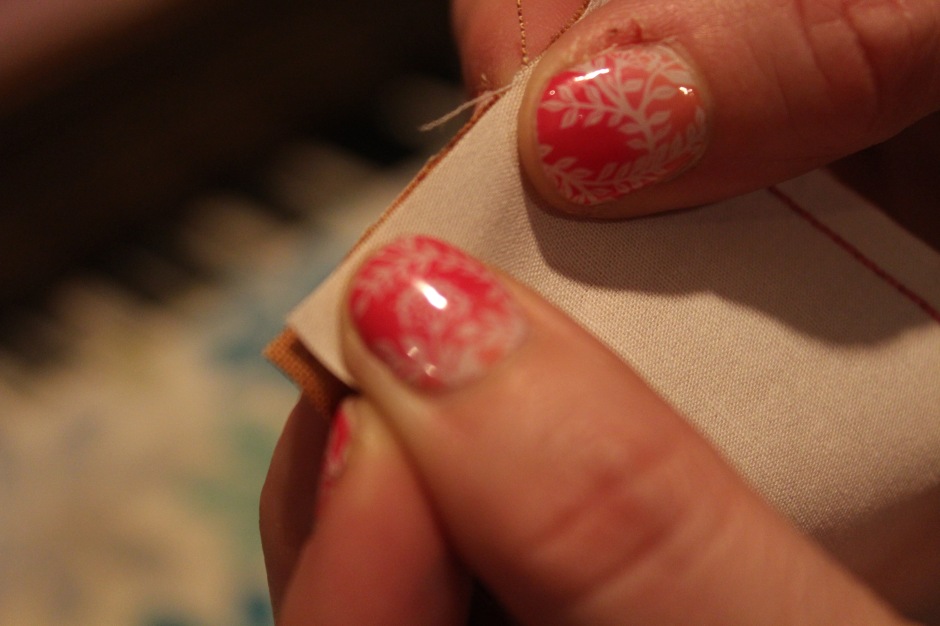
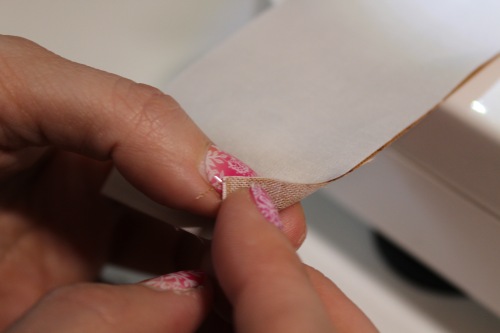
- Always start and END seams with the leader fabric. This way you don’t get bird’s nests at the beginning, and the feed dogs don’t try to eat your fabric at the end.
This is leader fabric. I just grab some smaller, scrap pieces and use that:
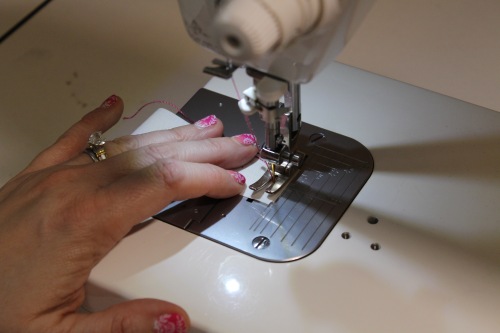
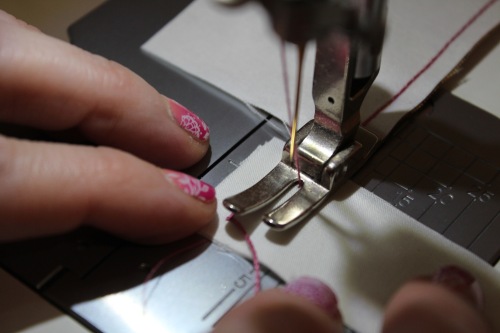
- Sew onto your fabric, then pause and match up the bottom of the pieces, holding them in your left hand. Gently pull and adjust the two pieces so they lay straight and match up.
Sewing onto the fabric:
Matching up the pieces. You don’t need to use pins for small piecework like this:
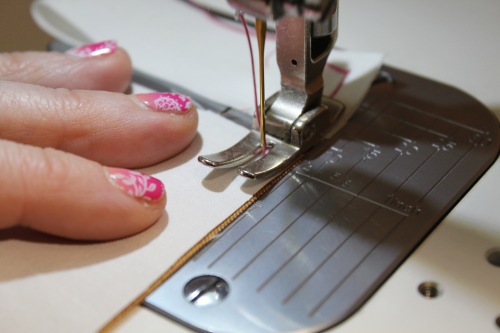
- With your right hand, guide the fabric as you sew using a stiletto as a mobile “pin”. Your left hand is holding the bottom of the fabric that you just matched, making sure it stays matched up. If you gently “tug” the fabric in this way (with your left hand holding the bottom, and the top being kept still by the needle), the fabric should just fall into alignment.
Keep the stiletto on the fabric, moving it down, until it hits the needle and runs out of room at the bottom:
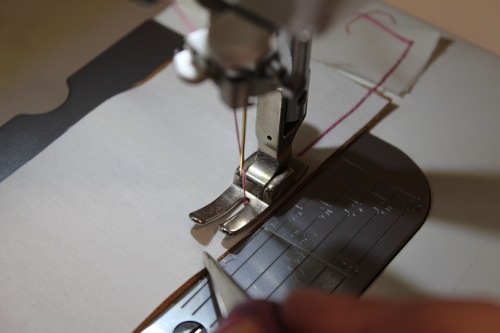
Sewing off the fabric:
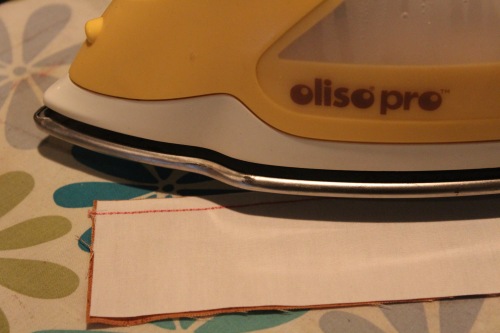
- Ironing: Before you set a seam, make sure the edges of both fabrics lie straight and match each other. Otherwise, the fabric tends to swoop out and make ripples once it’s opened up:
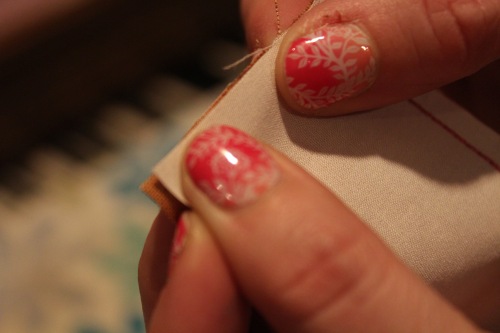
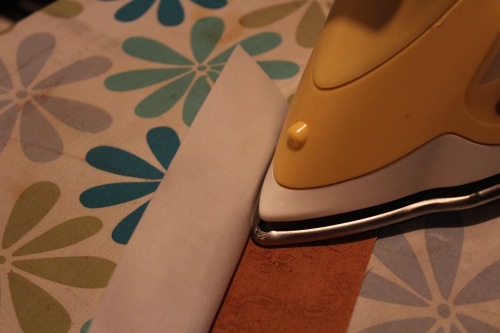
Setting a seam is an important step of quilting. When you set a seam (simply pressing the seam after you’ve sewn it, but before you open it up), it allows the thread to sink into the fabric. This will make your patchwork flat and lovely. It also will smooth out many tension issues that can cause wrinkles and puckers.
Setting the seam:
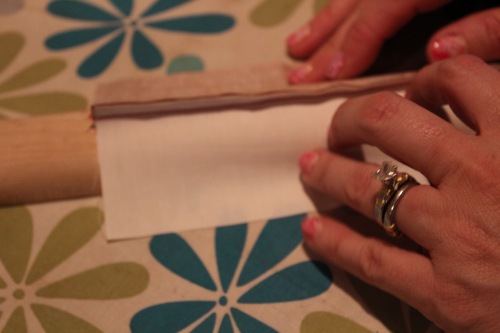
- After the seam is set and both ends of the pieces match, open the fabric and using the tip of the iron, gently run down the length of the seam opening the fabric as you go.
- I like my seams pressed open unless I’m doing a really bulky corner. (I know, I know, this will probably cause a riot in the comments section… have at it! What are your reasons for pressing closed or open? I’d love to hear!) I have a neat little tailors seam stick that allows me to press the seam open really nicely.

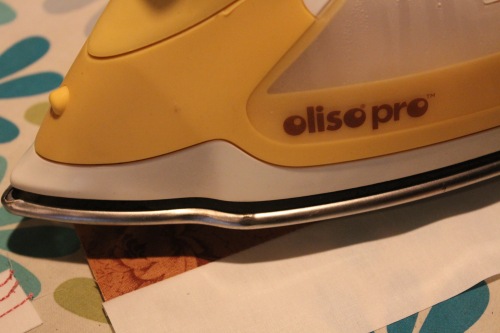
- Finally, turn the fabric right side up, set the iron down across the whole seam and “press.” (Don’t iron- the ironing motion stretches the fabric out)
I would love to hear if any of this helps anyone but myself out!
(BTW, a big kudos and shout out to my 16 year old who is my photographer… it always amazes me how tech savvy these kids are! She is taking photography this semester and loves it… she definitely has a knack for it, too!)

Thanks for sharing! I usually decide when piecing a block if I open the seams or press them to one side. Over the years I have lernt (sometimes the hard way) not to iron, but only to press! A big compliment to the photographer, well done!! Barbora
LikeLike
Good tips! 🙂 I switch between open or side seams depending on what I’m piecing and how I’m piecing it. It’s for my own convenience, mostly. 🙂
LikeLike
Excellent tips. I generally press to one side unless I’m doing a block with a lot of seams coming together. Then I’ll press them open. I also press open if I’m working on really small pieces. It seems to keep everything flatter.
LikeLike
I nearly always press seams open because I hand quilt and the bulk of so many layers (if pressed to the side) is just too much for me to quilt through. The downside to pressing open is that I usually have to pin to get cross seams to match.
I’ve read pros and cons to setting seams by pressing the stitching before opening to press. Someone wrote a post recently showing how not setting the seam allowed the quilt block to lie flatter than when she’d set the seam. I don’t set my seams.
Your daughter did a great job with the photos. Wish I had a photographer!
LikeLike